Here's a quick instruction on how to run a PowerShell script in Azure Automation on a SharePoint site. Bonus: use the new preview action in Microsoft Flow to call the script.
Use case
If you need to change some settings on a SharePoint site it's easy to do this with PnP PowerShell. For example it could be that your newly provisioned sites need some updates that cant be done during the site provisioning proces because you dont use PnP Core, or not the latest version.
By calling an Azure Automation runbook from Flow you can even trigger the PowerShell script after your site provisioning process using Microsoft Flow has finished, and update the desired settings in the site.
You will need the following to complete this tutorial:
- SharePoint Online and an account that has at least site collection admin rights
- An azure subscription.
- Some knowledge of PowerShell is useful.
Let's go!
Start in Azure:
1. Provision Azure Automation in a resource group
2. Go to modules > gallery > Add SharePointPnPPowerShellOnline
3. Go to credentials > Add credential named SHAREPOINTADMIN and fill in your SharePoint online account username and password.
The account needs to have the permissions in SharePoint that the script(s) requires of course, but it doesnt necessarily need sharepoint farm admin rights.
Site collection admin rights are enough if you want to run the script on a single SC.
- Add a Runbook and fill in this script. This is an example script that can update the sharing settings of the site. Save and Publish it. Use the test pane to see if it works.
Take note of the following lines:
$cred = Get-AutomationPSCredential -Name "SHAREPOINTADMIN";
Connect-PnPOnline -Url $siteUrl -Credentials $cred;
This gets the credentials you have just added to Azure Automation and uses the SharePointPnPPowerShellOnline commandlets to connect to SharePoint.
After this you can use any PnP PowerShell commandlet you want on that site collection.
In Microsoft Flow:
6. Open Microsoft Flow and create a new empty Flow.
7. Select the trigger you require. I'm using the simplest trigger which is Button for Flow.
8. Add an Azure Automation - Create Job action and select the AA account you have just used. Select the runbook and fill in the parameters.
9. Run the Flow and check in AA if the script has run successfully and in SharePoint if the settings have been applied.
PS:
The Create Azure Automation Job action in Flow is in preview. It doesnt work correctly 100%.
For example, you will often need to reselect the values you set in the action when you edit the Flow.
Also, the parameters of the Azure Automation runbook are not always fetched correctly. Save and leave the Flow, or reselect the runbook in the Flow action in order for Flow to show the correct input parameters.
Lastly, The Create Job action can't send boolean type variables correctly to the AA Runbook yet. That is why I've declared all my variables in the Runbook as strings or integers and cast them to booleans in the script itself.
This is a limitation of the Flow action which I assume will be solved shortly.
Dont forget to save and publish the Azure Runbook. If you change the parameters of the runbook you will need to edit the Flow and update the parameter values that you input.
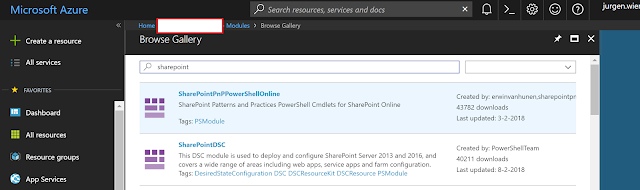
Add the SharePoint PnP PowerShell module in Azure Automation
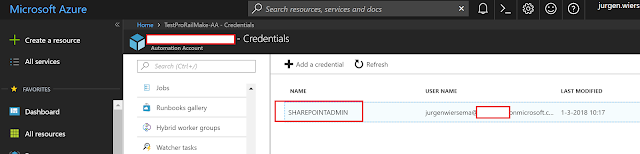 Add the credentials to SharePoint in Azure Automation
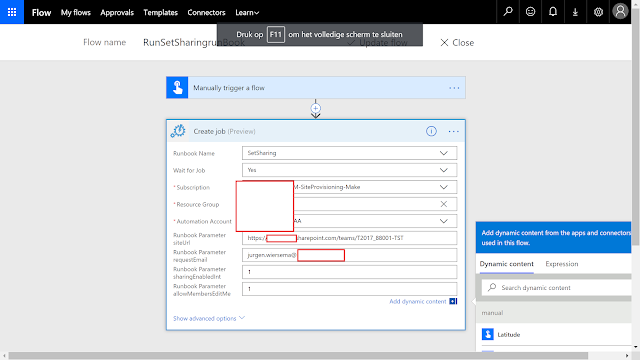 Use the Create Job action in Microsoft Flow to call the script and pass the parameters.